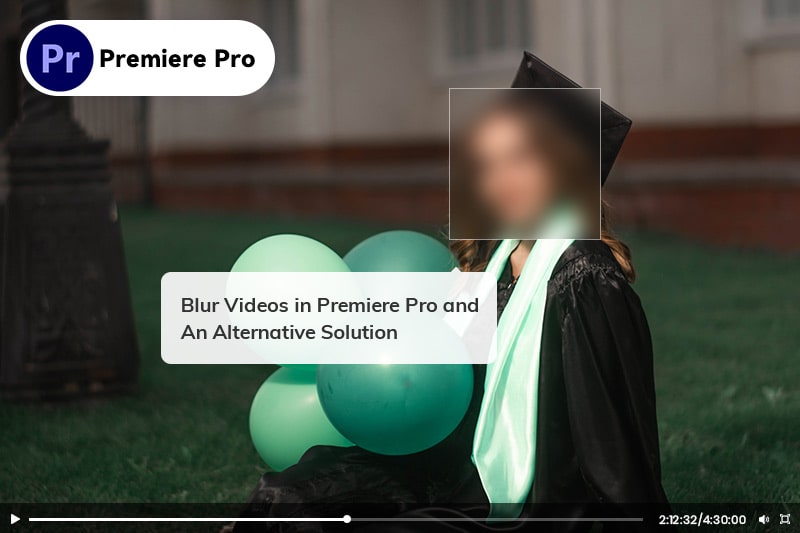
How to Blur Videos in Premiere Pro [2026 Guide]
 Posted By: Sherry Johnson
- Updated On: April 18, 2026
- Category: Video Editing Tips
Adobe Premiere Pro is commonly used to blur sensitive information, create professional video effects, or maintain anonymity by applying blur effects to videos. However, its workflow can be challenging for beginners. In this guide, we'll show you how to apply a full-screen blur or selectively blur specific objects in Premiere Pro. For those new to video editing, we'll also introduce an AI-powered alternative that lets you blur videos in just a few clicks. You can jump directly to Part 2 if you prefer a simpler solution.
You may also like: Best 4 Face Blurring Software on Computer | How to Blur the Background in Microsoft Teams
How to Blur Video In Adobe Premiere Pro
This part introduces various techniques for blurring video in Premiere Pro, including blurring the background, blurring faces, and more!
⚠️ Premiere Pro Preparations:
- Version: Ensure you're using Premiere Pro 2023/2024/2025 (older versions may have different effect locations).
- Video Format: Supported formats include MP4, MOV, AVI (avoid rare formats like WebM to prevent crashes).
- Hardware: For 4K videos, ensure your PC has at least 16GB RAM (blurring with masks/keyframes is resource-intensive).
A. Blur The Full Screen
If you want to add some visually captivating effects to your video project, blurring the entire screen can do the trick! Here's how you can achieve this effect:
- 1. Open up your video and import it into the Premiere Pro you wish to edit and drag onto your timeline.
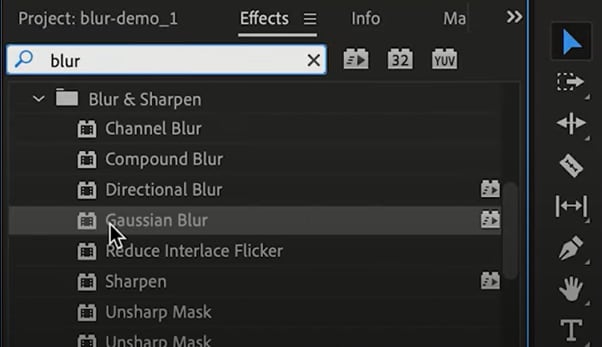
- 2.Go to Effects > Video Effects > Blur & Sharpen → Select "Gaussian Blur" (most versatile for censoring) or "Directional Blur" (artistic effect).
- 3. Drag the blur effect from the Effects Panel onto your footage in your Timeline.
- 4. Finally go to the Effects Controls and choose the “amount” of blur you want. (Suggested: 15-30 for censoring; 5-10 for subtle artistic effect).
- 💡 Tip: Check "Repeat Edge Pixels" to avoid dark edges on the video frame.
That's it, you've added censor blur in Premiere Pro to your footage.
B. Blur Out A Particular Part Of A Video Clip
An item blur is employed to anonymize a specific "item" in a shot, such as a product logo or personal information. The purpose is to maintain anonymity and protect privacy. Here are the steps:
Step 1: First and foremost, duplicate the video (Right-click clip > Duplicate) and put it on top of Track 2 (above the original). Apply "Gaussian Blur" to the Track 2 clip (Effect Controls > Blurriness = 20-40).
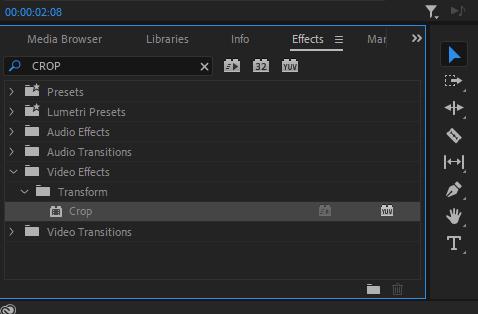
Step 2: Go to your Effects Panel and look for Crop Effect. Then add "Crop" effect to the Track 2 clip → Adjust "Left/Top/Right/Bottom" to narrow down the area to blur (e.g., crop 80% of the screen to focus on a logo).
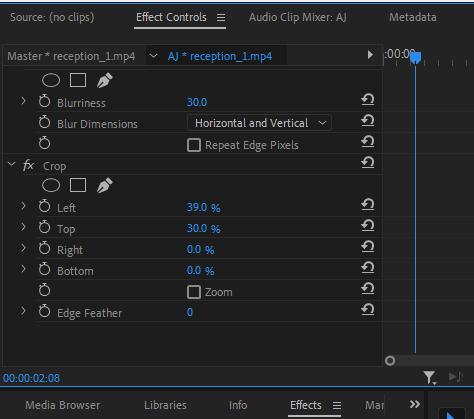
Step 3: Add "Feather" (suggested: 5-10) to soften the crop edge.
For moving objects: Click the "Toggle Animation" icon next to "Crop" in Effect Controls → Move the playhead to key frames, adjust the crop area, and Premiere will auto-generate tracking keyframes.
⚠️ Note: If the object moves fast, add keyframes manually every 5-10 frames for accuracy.
Done. You can follow this steps to blur out a logo, or literally anything.
C. How To Blur Video Background In Premiere Pro
Below is a tutorial to guide you to blur the background in Premiere Pro step-by-step:
Step 1: After importing your video into Premiere Pro, click the “Window” option from the top toolbar and select “Effects” from the drop-down menu to open the “Effects Panel.” Search and find the “Gaussian Blur” effect. Drag and drop the effect on the clip in the timeline to apply.
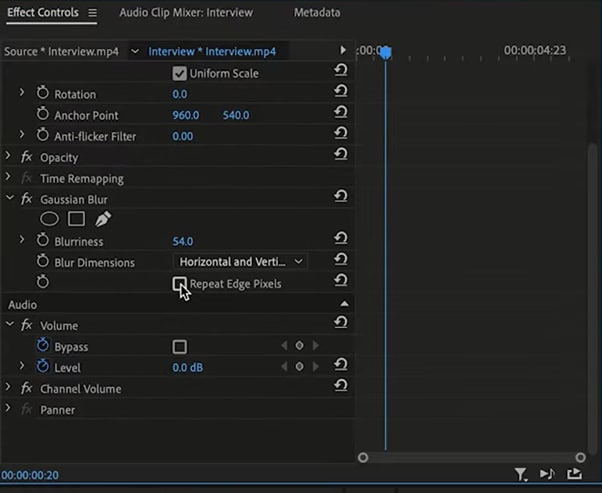
Step 2: Click “Window” > “Effect Controls” to open its panel. Scroll down until you find the "Gaussian Effect" in the panel, and then increase the blurriness level. This will apply a blur effect to the entire clip.
In case the edges of your clips darken, make sure to enable the "Repeat Edge Pixels" option to fix it.
Step 3: Next, you need to create a mask around the subject to remove the blur effect. Click on the "Free Draw Bezier" tool located under the "Gaussian Blur" option in the Effects Control Panel.
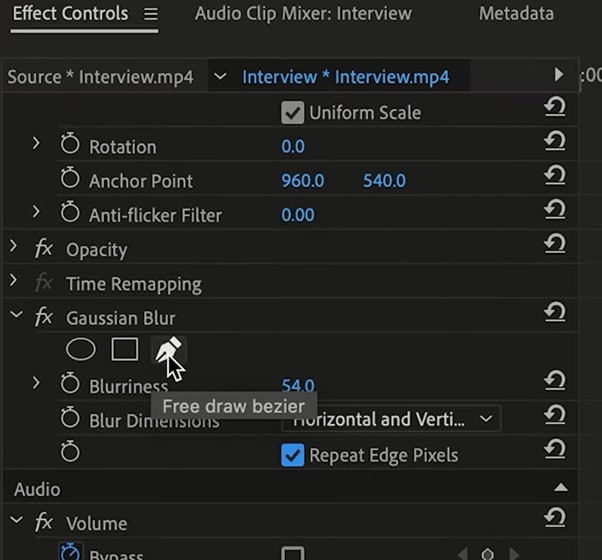
In the Program Monitor window, trace the outline of the element or subject in your video. Remember to connect the trace line back to the starting point.
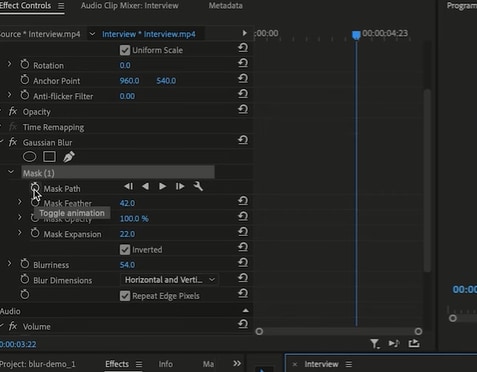
Step 4: Check the "Inverted" option under the "Mask Expansion" header in the Effects Control Panel to blur your background. Hit the "Play" icon to preview your video. If you notice any sharp edges around the subject, click on "Mask" and select the selection tool to refine it.
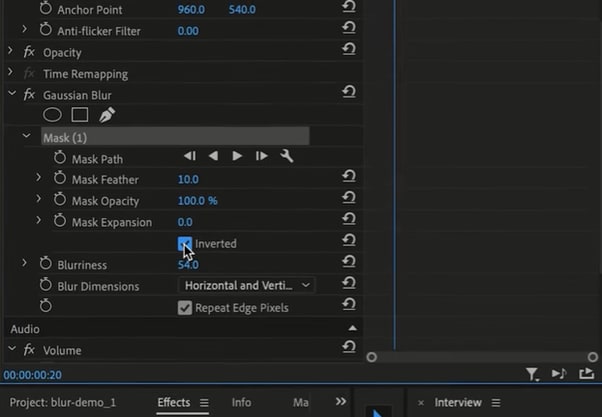
Adjust the individual points in the outline as needed. Increase the value of "Mask Expansion" to expand the size of the mask, and decrease the value of "Mask Feather" to make the edges softer.
Step 5: If your subject moves around in certain parts, click the toggle button next to "Mask Path" to create keyframes. Then, navigate through the timeline and adjust the mask on the subject to achieve a professional-looking video.
Lastly, go to "File" > "Export" in the top toolbar, enter a file name, choose a location, and click "Export" to save the file on your PC.
D. How To Blur Faces In Premiere Pro
Here's a simple guide on blurring faces in Premiere Pro for you to learn how to add censor blur in Adobe Premiere Pro. It is a straightforward overview of the process.
- Import video and drag to Timeline.
- Go to Effects > Video Effects > Blur & Sharpen > Gaussian Blur → Apply to the clip.
- In Effect Controls, click the Ellipse Mask Tool (under Gaussian Blur) → Draw a circle around the face in the Program Monitor (ensure the circle covers the entire face).
- Adjust "Mask Feather" (10-15) to avoid harsh edges.
- Auto-track the face: Right-click the mask path in Effect Controls → Select "Track Mask" → Choose "Face Tracking" (Premiere Pro 2023+ feature) → Click "OK" to auto-track the moving face.
💡 Alternative for old versions: Manually add keyframes by toggling "Mask Path" animation and adjusting the mask at each key frame.
❌ Troubleshooting for Premiere Pro Blurring
- Blur effect not applying: Ensure the clip is selected in the Timeline (not the Project Panel).
- Mask not tracking smoothly: Increase "Mask Feather" and reduce keyframe intervals.
- Video lagging: Go to File > Project Settings > General→ Set "Renderer" to "GPU Acceleration" (requires a compatible graphics card).
- Dark edges after blurring: Enable "Repeat Edge Pixels" in the Gaussian Blur settings.
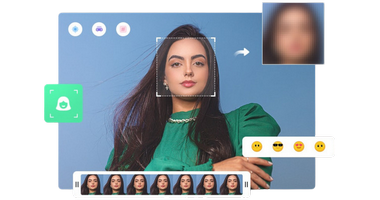
AVCLabs Video Blur AI: The Best AI Alternative for Hassle-Free Blurring
While Adobe Premiere Pro is so professional, it may not be user-friendly for beginners. You will find the above process quite complicated, leading users to feel overwhelmed and confused. For new folks, the need is to have a simple, yet effective application. And there are alternative solutions. AVCLabs Video Blur AI is an AI solution among them.
For users who don't want to deal with masks, keyframes, or complex settings, AVCLabs Video Blur AI is a game-changer. It uses advanced AI to auto-detect and track faces, license plates, or custom objects—no manual editing required. The following are different guides for various uses.
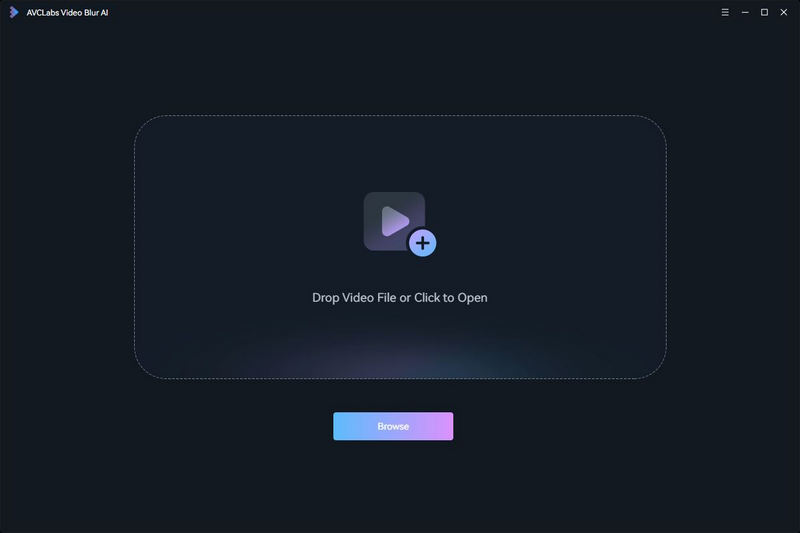
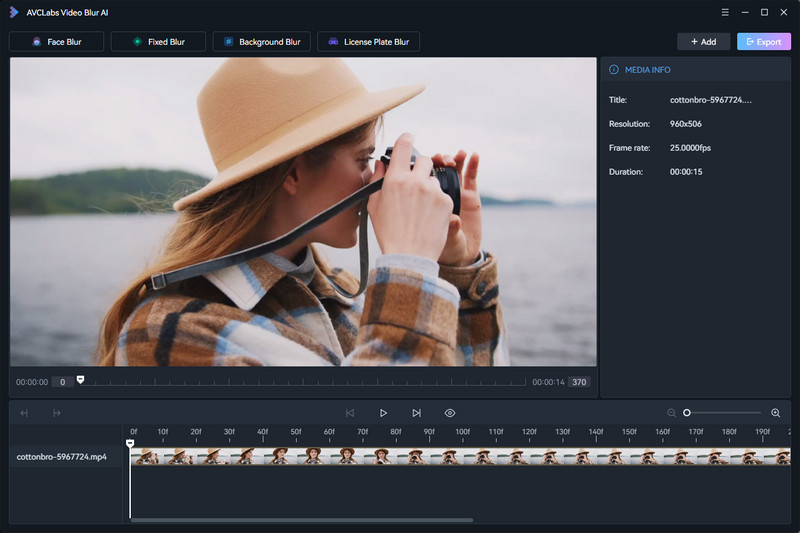
Before it, just download and install AVCLabs Video Blur AI to your computer. Double-click to launch it. Click the "Browse" button or simply drag and drop the video file to import the video into the program.
How to Add Censor Blur in Video with AI
Case One: How to Blur and Pixelate Moving Object like License Plate
Step 1: At the top of the interface, there are four types of blur options. You can select the blur type according to your needs. To blur car plates, click the "License Plate Blur", then it will be automatically added to the taskbar on the timeline.
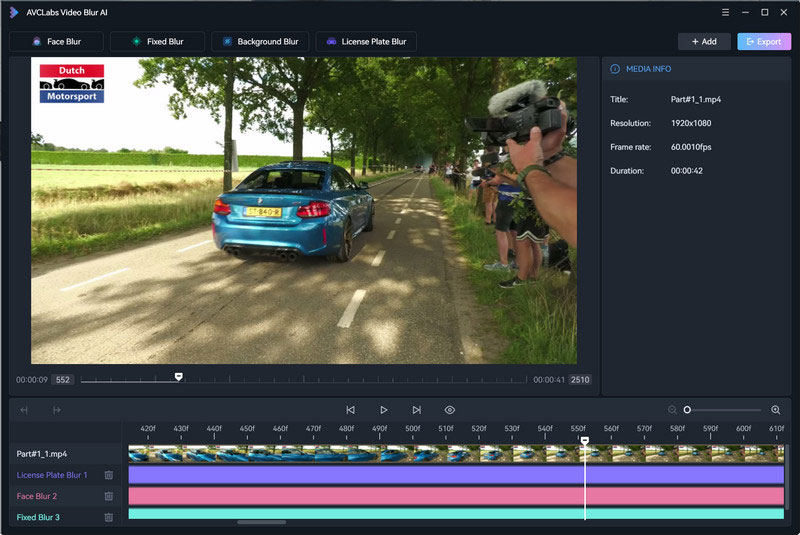
Step 2: Right-clicking the timeline panel at the bottom, you can set specific start and end frames for the video segment you wish to blur the License Plate, or directly adjust the task duration by dragging the taskbar slider.
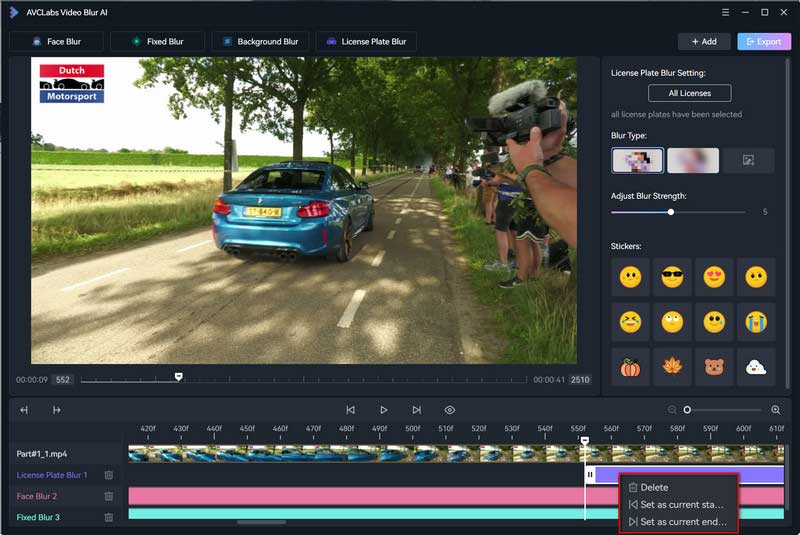
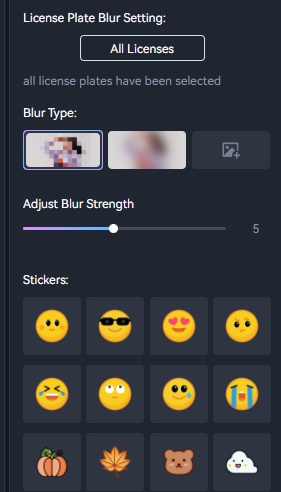
Step 3: You can customize the blur type as Mosaics, Gaussian blur, Customized images, and preset stickers. And adjust the blur strength.
Step 4: Once you've completed all the necessary settings, click the "Eye" button to preview the effect. You can always go back to make adjustments if needed. When you're satisfied with the result, click the "Export" button to generate the final blurred video.
Case Two: How to Blur Single Or Multiple Faces In Video
If you're looking for a way to blur faces in videos, AVCLabs Video Blur AI is a great option. This AI-powered tool can automatically detect and blur faces in videos, making it quick and easy to protect people's privacy.
Plus, the results are natural-looking and realistic, so you don't have to worry about your videos looking fake or edited.
Step 1: Open the video in the program.
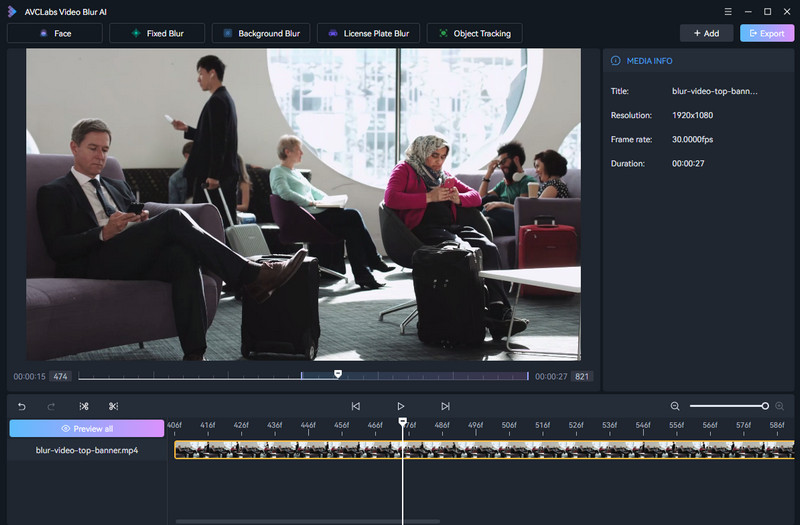
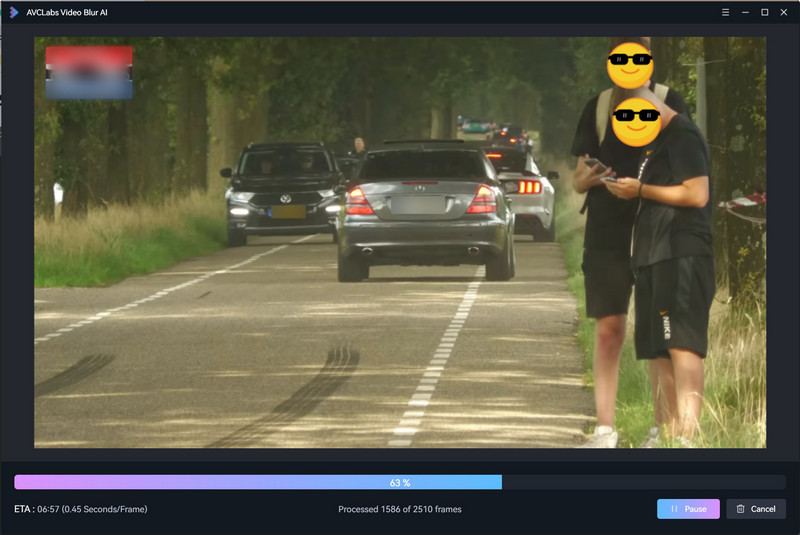
Step 2: Click the "Face Blur" and a Face Blur layer will be added to the timeline. Pick on it and you can choose to blur all faces or blur the defined face, blur type, strength, sticker, etc.
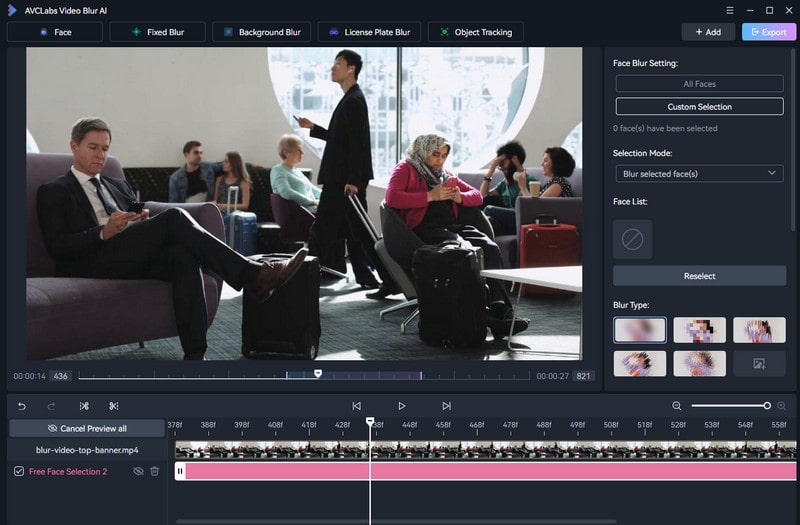
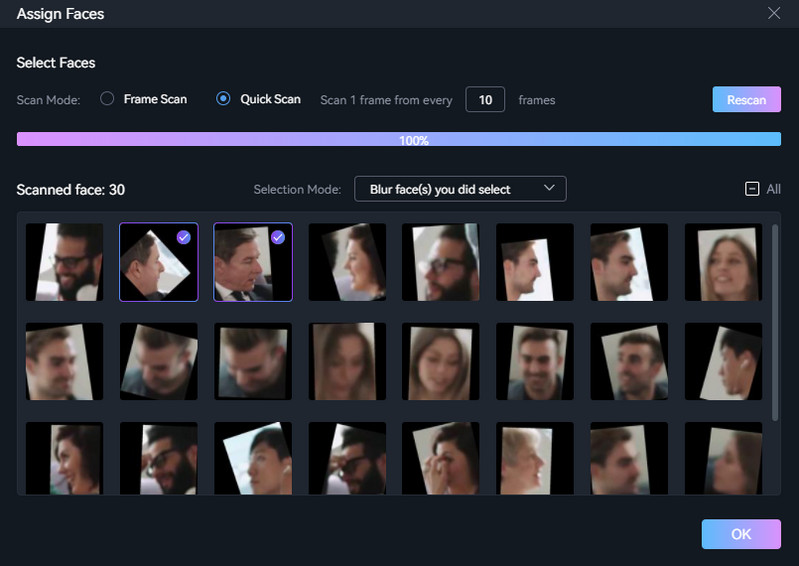
If you choose "Assign Faces", the program needs to scan and display all faces found for your choice.
Step 3: Click the "Export" button on the top to start video processing.
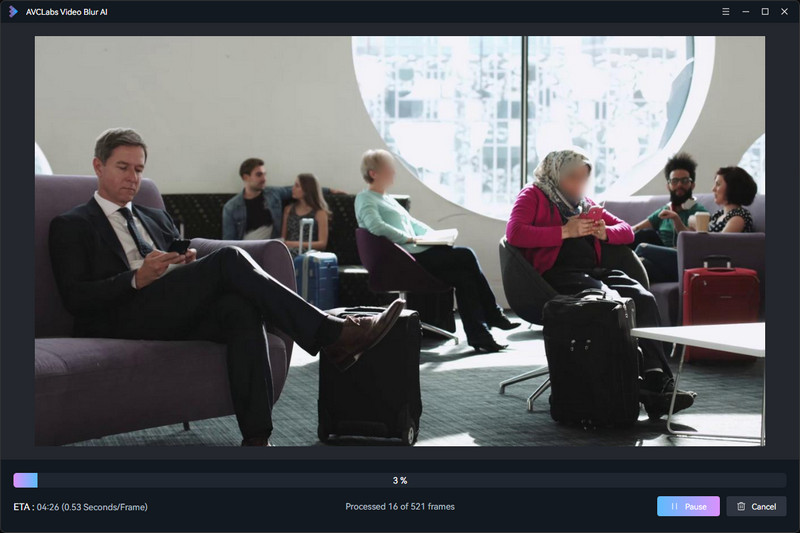
Step 4: Finally, you will get the video with blurred faces.
Video Tutorial: How to Blur Faces in Video Easily
Some old films may be blurry and lack an HD version. No worries—try AVCLabs Video Enhancer AI to upscale your blurry videos to 8K with natural details. Learn more >>
Case Three: How to Blur Video Background
Step 1: Drag and drop the video you wish to blur directly onto AVCLabs Video Blur AI.
Step 2: Navigate to the Background Blur model located at the top of the program. From the Background Blur Setting, select the Background Blur option and then choose the desired blur style: Mosaic, Standard Blur, Longitudinal Blur, Blique Blur, and Particle Blur.
Tips: You have the flexibility to customize the blur strength by simply dragging the Adjust Blur Strength slider.
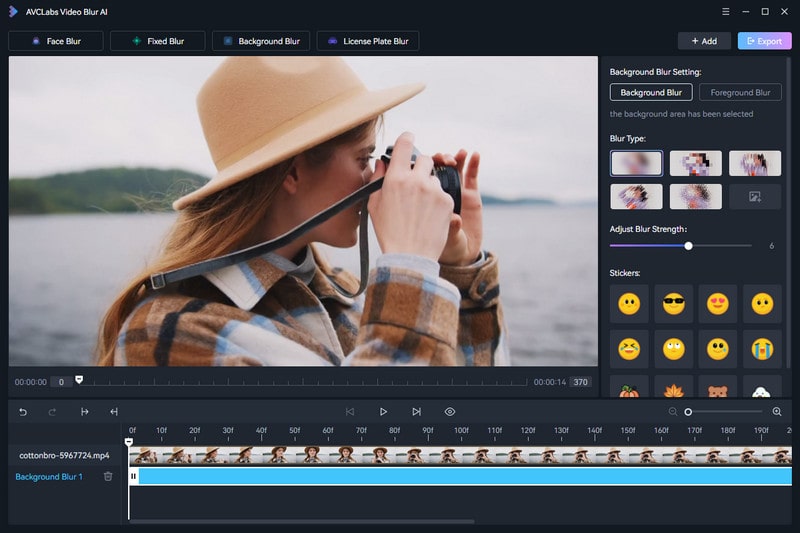
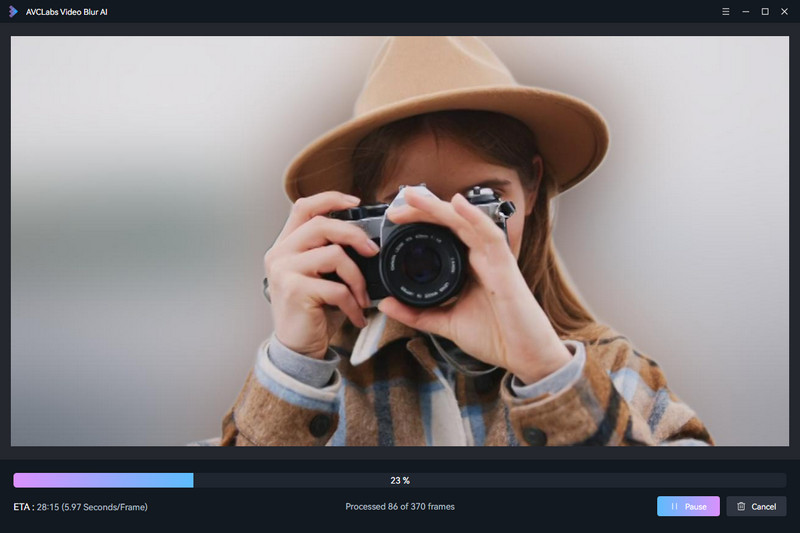
Step 3: Click on the Export button. Once the video background blurring process is complete, you can view the processed video by selecting the View Output Video button.
Comparing Premiere Pro And Best AI Alternative
When comparing Adobe Premiere Pro and the alternative method, such as AVCLabs Video Blur AI, there are notable differences to consider. Here is a quick overview:
| Comparison | Adobe Premiere Pro | 🔥 AVCLabs Video Blur AI |
|---|---|---|
| Target User | Professional editors / complex projects | Beginners / quick tasks / batch processing |
| Learning Curve | Steep (needs 1–2 weeks to master blurring) | Zero (10-minute setup + 1-click operation) |
| Key Features | Full customization (masks / keyframes / effects) | AI auto-detection & tracking + presets |
| Blurring Scenarios | All (full screen / partial / background / face) | All (plus license plate blur) |
| Processing Speed | Slow (4K video: ~10 mins per 1 min footage) | Fast (4K video: ~2–3 mins per 1 min footage) |
| Cost | 7-day free trial → $20.99/month (subscription) | Free preview → $ 19.98/month (subcription) |
| Compatibility | Windows / Mac | Windows / Mac |
| Offline Use | Yes (after installation) | Yes (no internet required for processing) |
| Batch Processing | Manual (repeat steps for each clip) | Yes (blur multiple videos at once) |
Verdict: Which Should You Choose?
- If you're a professional editor working on short films, commercials, or complex projects that require precise control over blur effects (e.g., adjusting mask feather for artistic purposes), Premiere Pro is worth the investment.
- If you're a beginner, content creator, or business owner who needs to blur videos quickly (e.g., censor faces in vlogs, blur license plates in social media clips), AVCLabs Video Blur AI is the better choice—it saves 80% of your time with AI automation.
- If you're on a budget: Try Premiere Pro's 7-day free trial for complex projects, and use AVCLabs' free preview for simple tasks.
Key Features of AVCLabs Video Blur AI
- Automatically detect and track license plate in videos.
- Blur the detected faces selectively for single face or multiple faces in a video.
- Blur or pixelate any parts you want to keep private in a video.
- Automated blur solutions for face, back/foreground, object and license plates.
Part 4: Final Words
In conclusion, both blurring videos in Premiere Pro and exploring alternative solutions have their own merits and considerations. Premiere Pro, as a powerful and feature-rich video editing software, offers extensive tools for blurring effects and is well-suited for professional users seeking advanced customization options. However, it may require a certain level of expertise and time investment to fully harness its capabilities. On the other hand, alternative solutions like AVCLabs Video Blur AI present a user-friendly and accessible approach, appealing to beginners or users who prioritize simplicity without compromising on quality. Ultimately, the choice between Premiere Pro and alternative methods depends on individual needs, skill level, and specific project requirements.